
















Install and first run
White Christmas installs like any other PrestaShop module, from the Module Manager. Once it is in, everything lives on a single back-office page. This chapter installs the module, turns on the master switch — the one action that makes your shop festive — and walks you around the dashboard, so you know what you are looking at.
Install from the Module Manager
You install White Christmas from Modules › Module Manager, the same place you manage every other module. There are two ways in, depending on where you got it:
- Open Modules › Module Manager in your back office.
- If you downloaded the module as a ZIP, click Upload a module and choose the file. If you bought it on PrestaShop Addons and linked your account, type White Christmas in the search box and click Install.
- When the install finishes, click Configure to open the module.
White Christmas runs on PrestaShop 1.7.8, 8.x and 9.x, and on multistore. It does not touch your theme, your prices or your catalogue — the effects sit on top of the shop you already have, and uninstalling removes them cleanly.
Find your way around
The whole module is one page: a top bar, a live status line, a menu of sections on the left, and the chosen section's settings on the right — with a live preview and an ⓘ help note on each field. The first section you land on is the Overview dashboard.
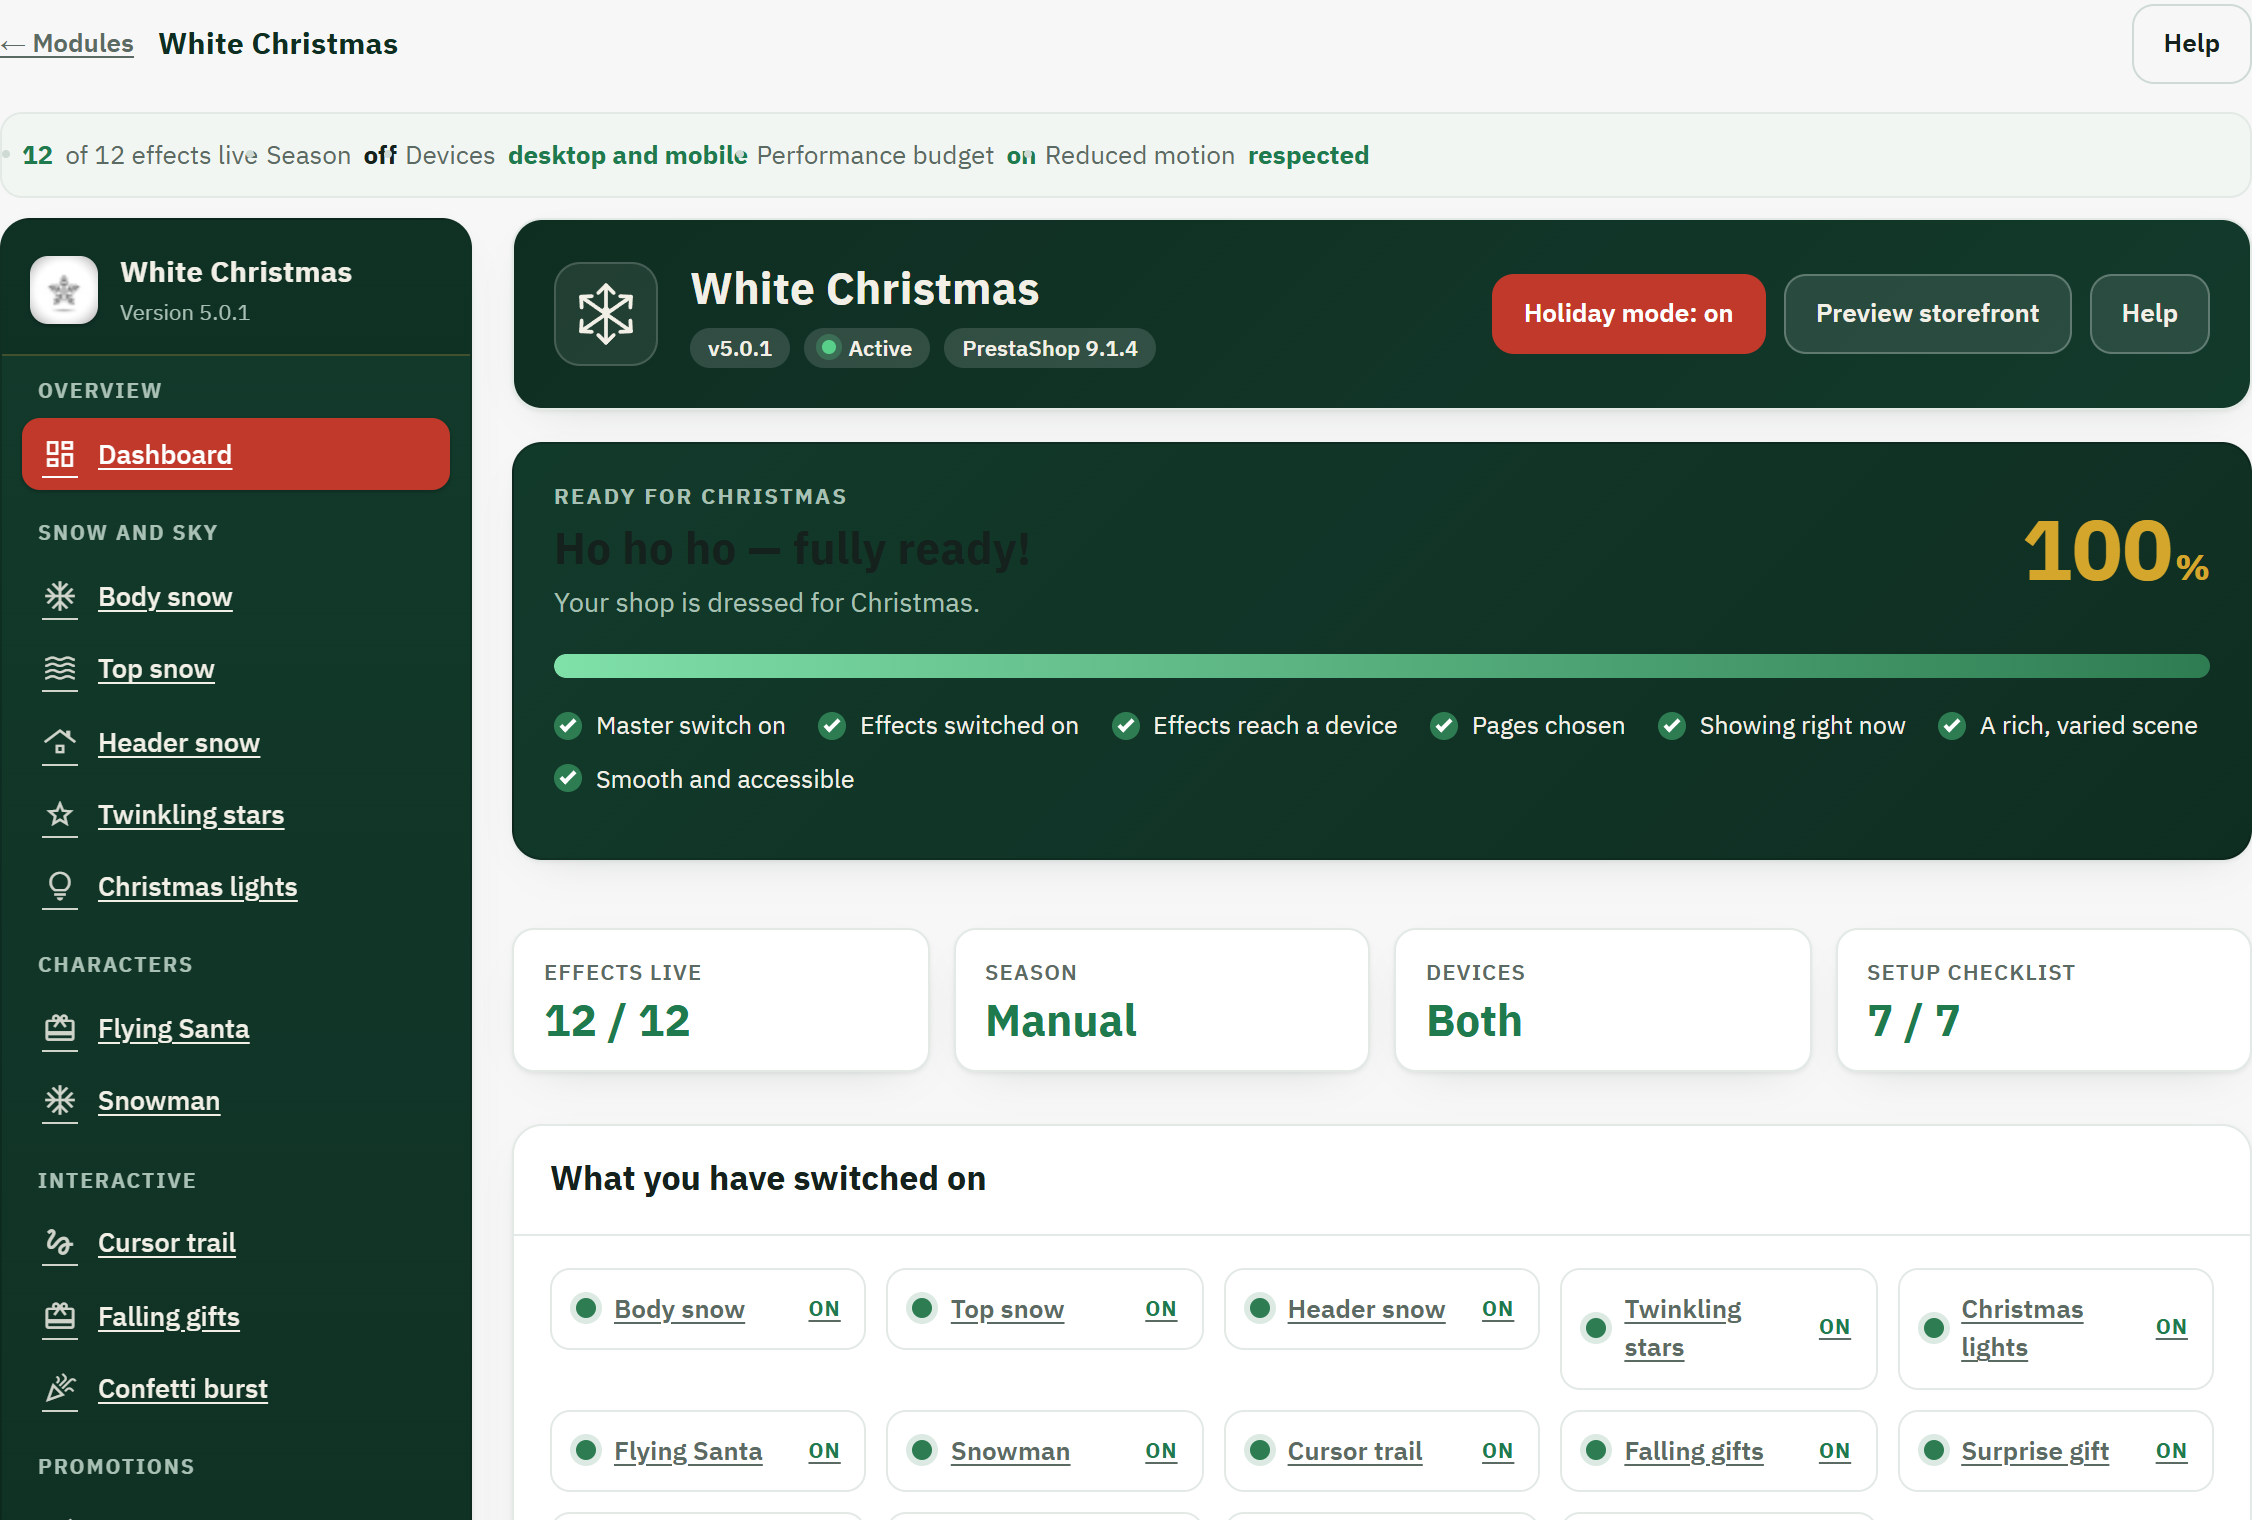
- The module's branding — its logo, name and version number — so you always know which module, and which version, you are working in.
- The live status line: how many effects are live, whether the Season schedule is on and its dates, which devices the effects reach, and whether the performance budget and reduced motion are respected.
- The section menu, grouped the way you think about your shop — Overview, Snow and Sky, Characters, Interactive, Promotions, Settings and Help.
- The dashboard's main button, Holiday mode, which jumps straight to the Setup page where the master switch lives.
- The readiness area of the main panel — the "Ready for Christmas" meter and the name it gives your shop's current state.
Nothing shows on your storefront until the master switch is on, so that is always the first thing to do. You set it, and everything else, on the Setup page (Setup):
- On the dashboard, click Holiday mode — or open Settings › Setup from the menu.
- Under Season and master switch, turn the Master switch on.
- Click Save. Your shop can now show its festive effects.
Read the Overview dashboard
The dashboard is where you check, at a glance, that everything is set the way you want. It reads your saved settings — it does not track anything — and tells you what is on and whether your shop is ready for the season.
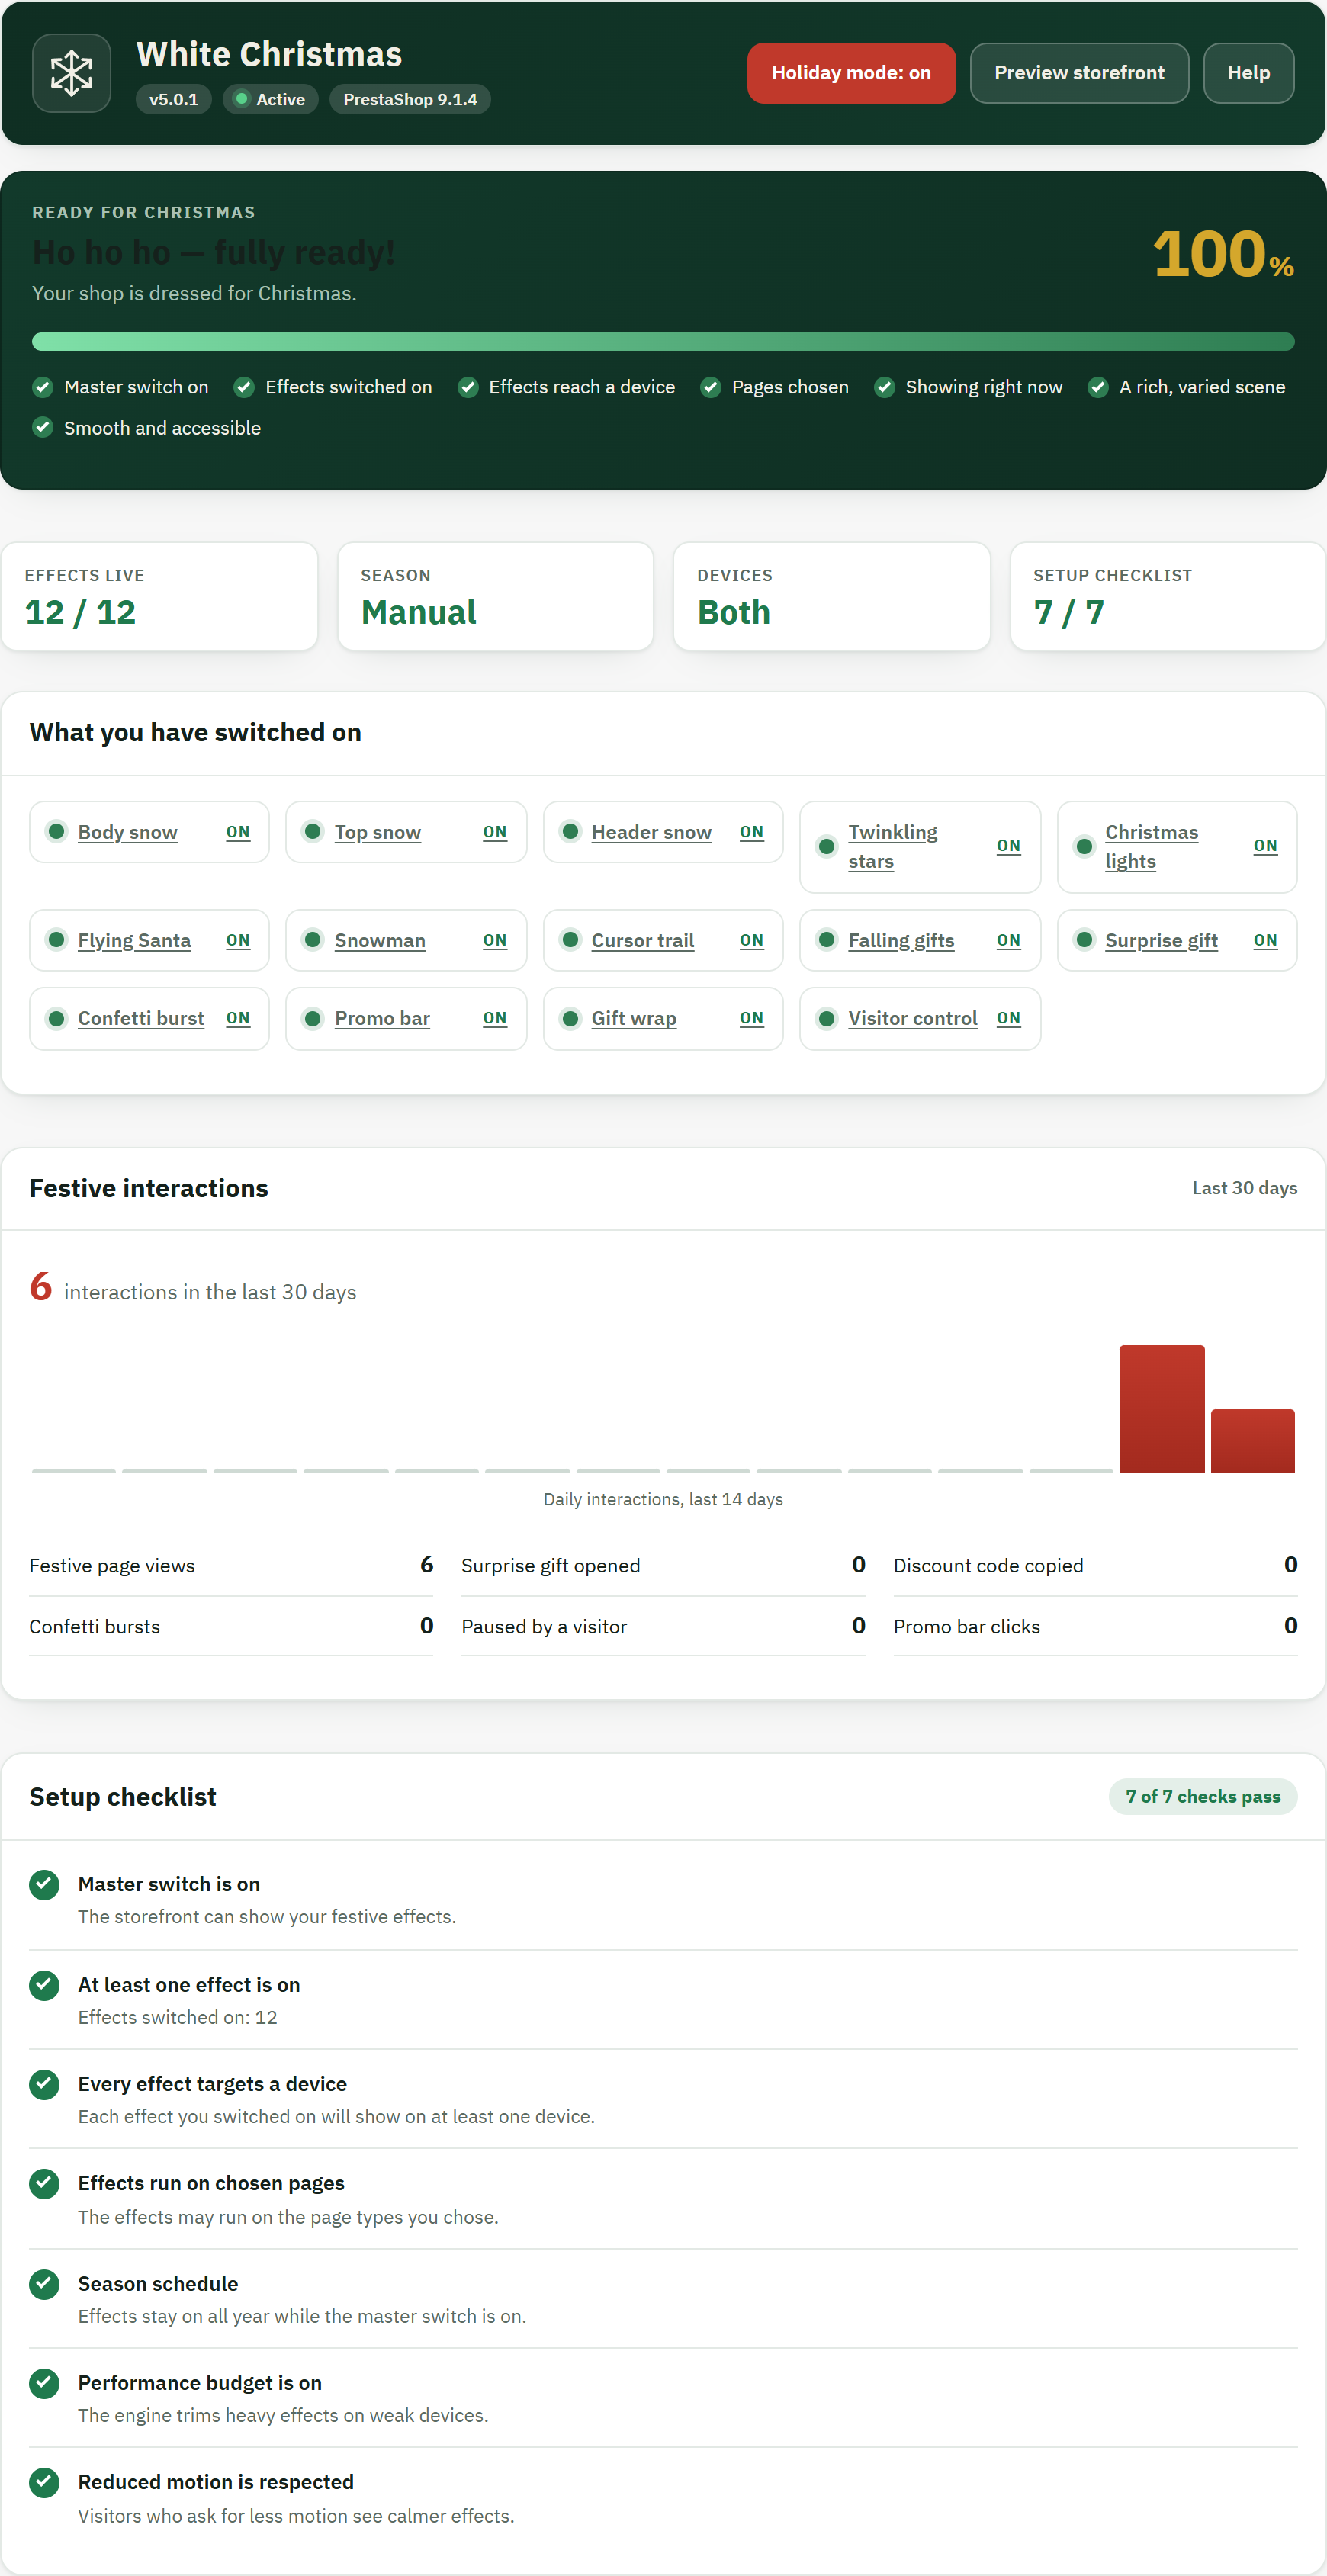
- The Christmas-readiness meter — a score with a friendly label, built from the things that make a shop festive: the master switch on, effects chosen, a device to show on, and so on.
- The key-figure tiles: effects live, the season state, the devices the effects reach, and how many setup checks pass.
- The What you have switched on grid — every effect and feature with its On or Off state, each one a shortcut to its own section.
- The Festive interactions chart — a cookieless, anonymous count of how visitors engage with the effects over recent days. It never identifies anyone.
- The Setup checklist count — how many checks pass — with a Fix link on anything that still needs your attention.
The readiness meter and the checklist are there to guide you, not to grade you: a warning usually means an effect is on but has no page or device to show on. The statistics stay off until you turn them on under Experience (Experience), and the whole dashboard — meter, stats and the in-module help — is covered in Dashboard, stats and help.